I’ve had my X100V for a couple of years now (and several other X100 series cameras before that) but it ‘s never been my main, or only, camera. For as long as I can remember I’ve had a camera with interchangeable lenses – film in the ‘old’ days, and digital more recently. Always seeking perfection, I gravitated to full frame, and ended up with a significant sized Sony A7iii outfit. A most capable camera, with huge dynamic range, and superb image quality, but I realised that the weight of the camera and it’s rather bulky and heavy lenses and accessories were becoming a real burden to carry – not helped by my advancing years, and dodgy back!
First thoughts were to offload the heavy (but excellent) zoom lenses in favour of 2 to 3 smaller prime lenses so I kept the excellent full-frame image quality of the Sony, but it soon became clear that that wasn’t really going to solve the problem. as it was still quite a weight to carry around with tripod etc.
What also became apparent was that I was falling out of love with photographing landscapes – after all I’ve been doing it for more years than I can remember, and with so many photographers taking good landscapes, it’s increasingly difficult to come up with something ‘new’. Tramping up and down hills with camera and tripod, and getting up at the crack of dawn for sunrises have definitely lost their attraction.
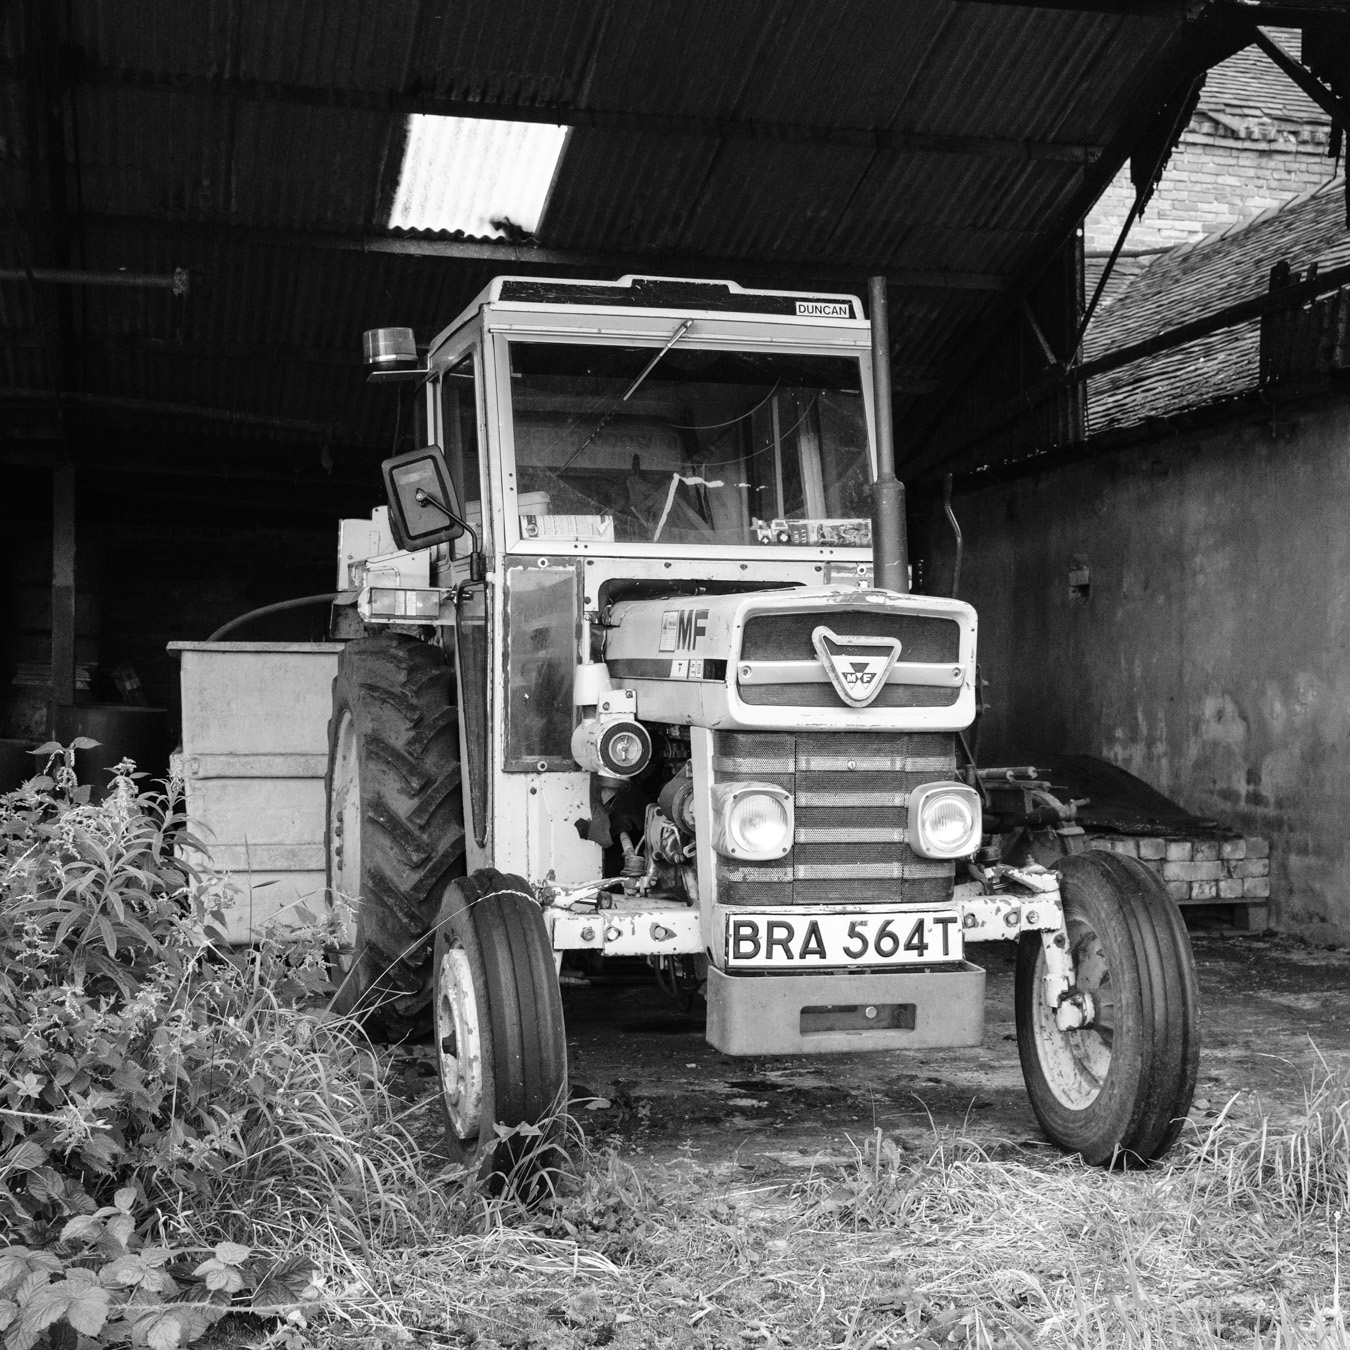
So, I really needed a fundamental rethink of what I was going to photograph, and what camera to use. Fair to say that I’ve enjoyed finding ‘quirky’ or different photos of everyday life, and I’ve always been a fan of monochrome, even though I’m not very good at it! I was reminded of the excellent One Year, One Mile, One Lens slideshow by Todd Gipstein. If you haven’t watched it, I certainly recommend it. It’s 10 years old now, and was entirely shot on an original Fujifilm X100 camera – and for me it’s a stark reminder that it’s the photographer who makes the image, not the camera.
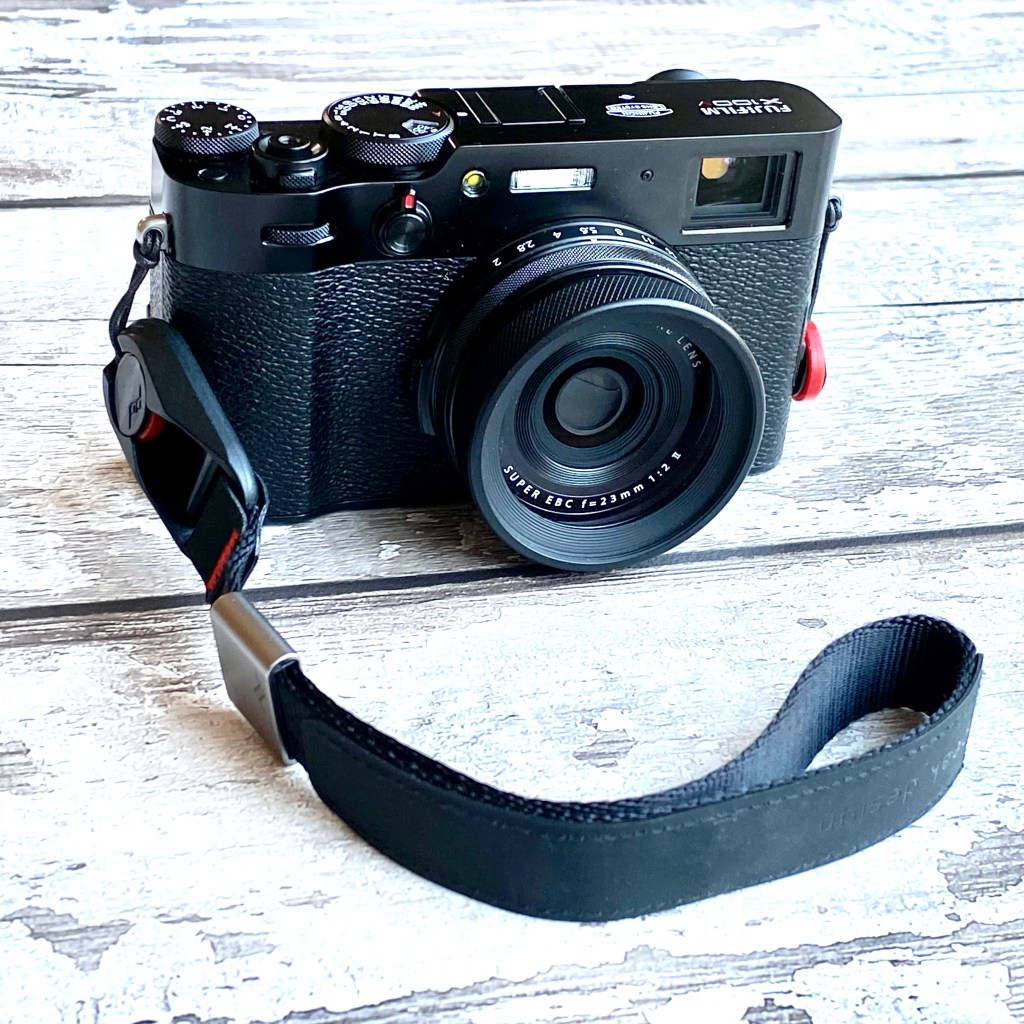
Something of a Eureka! moment, crystallised by some wise words from my dear wife… (she’s always right!) So I’ve sold the entire Sony outfit (no point in just putting it in a cupboard as the temptation to revert to it would be too great) and the little X100V is my only camera! It all fits in a small shoulder bag – just a couple of filters and spare batteries etc, and I even have a lightweight tripod that is fine for it if I really feel the need.
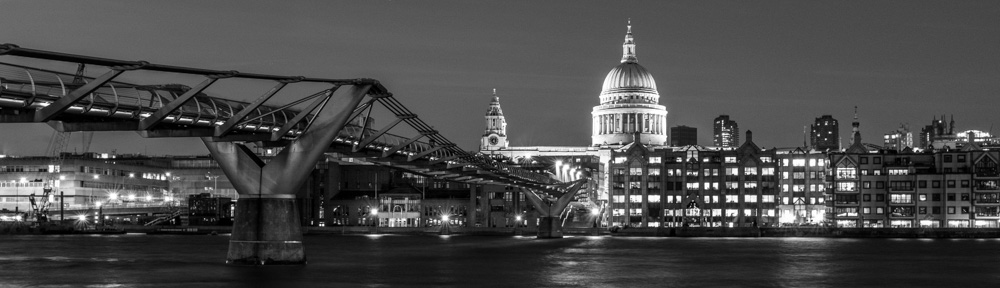
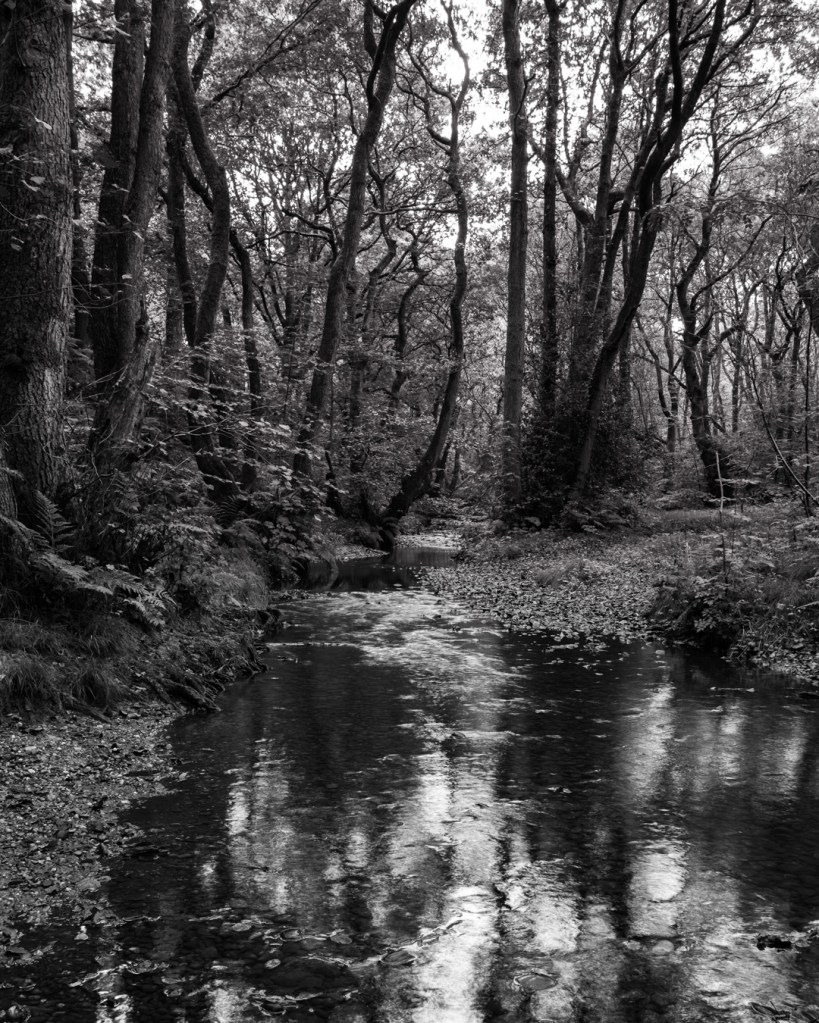
More to the point, I’ve decided its going to be mono only, at least for a while, and I’ve set up the camera accordingly. I’m not saying I won’t be taking any ‘outdoorsy’ photos (yesterday I had a little wander in some local woodland) but there will be no more traipsing across hills or along muddy paths at the crack of dawn, or stumbling around in the dark finding my way back to the car!
It’s going to be an interesting journey, and I feel quite liberated, so watch this space!

 Hmm, so I may have said I would never sell my X100F, but things change… I decided that it wasn’t really as portable as I wanted, so let it go in favour of the new Ricoh GR3 – similar APS-C sensor, but in body image stabilisation and a touch screen, all small enough to slip in a trouser pocket.

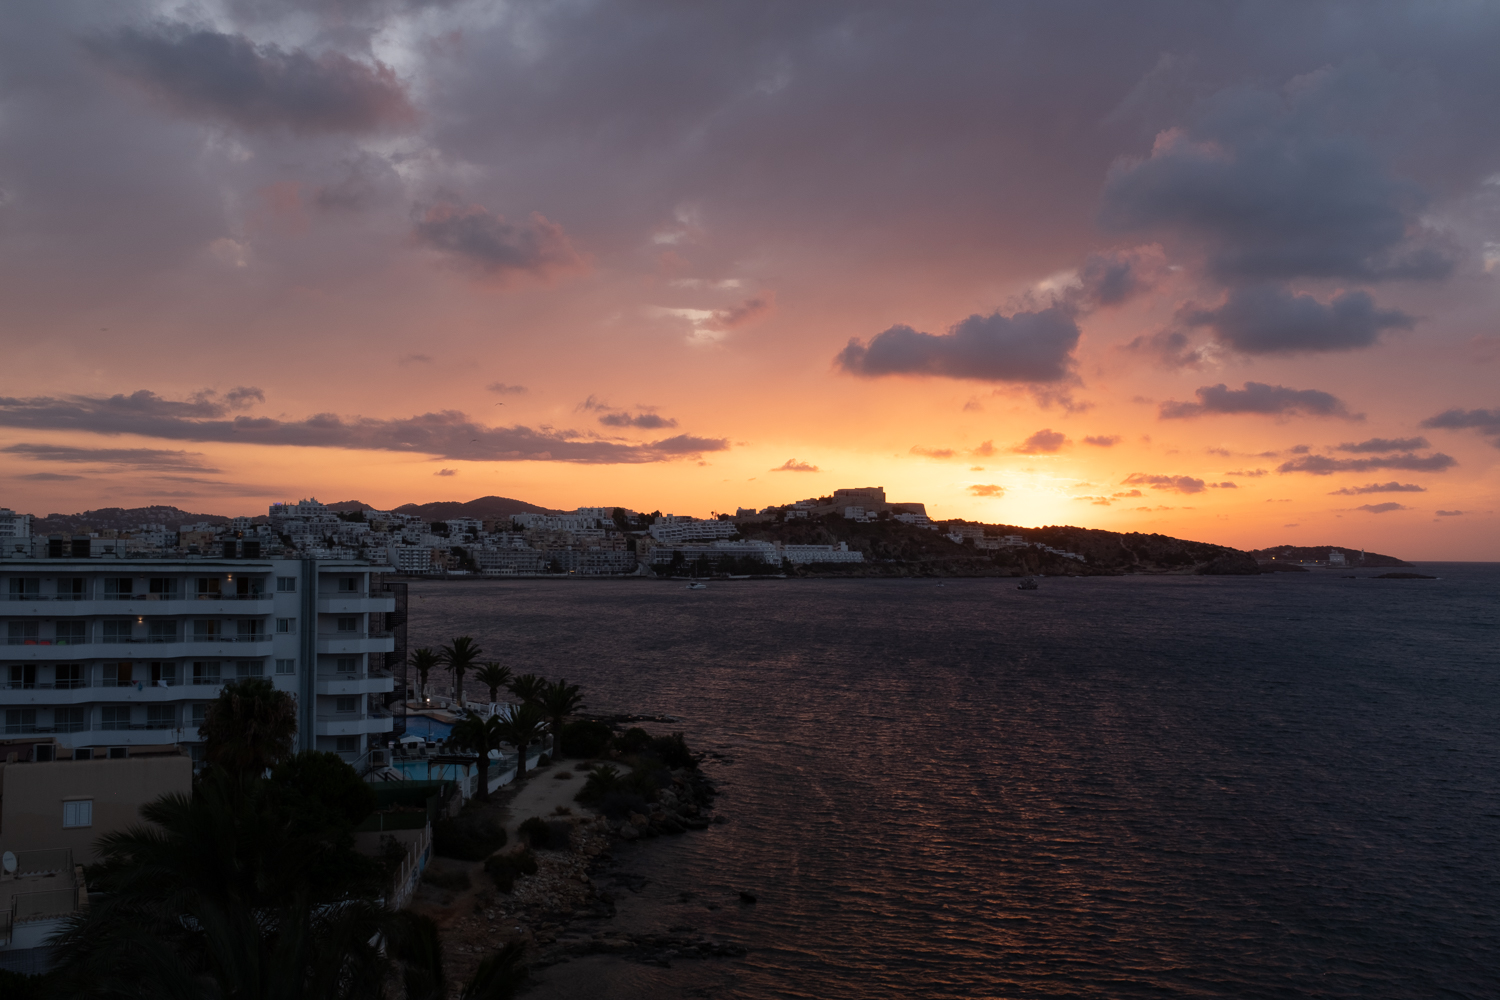

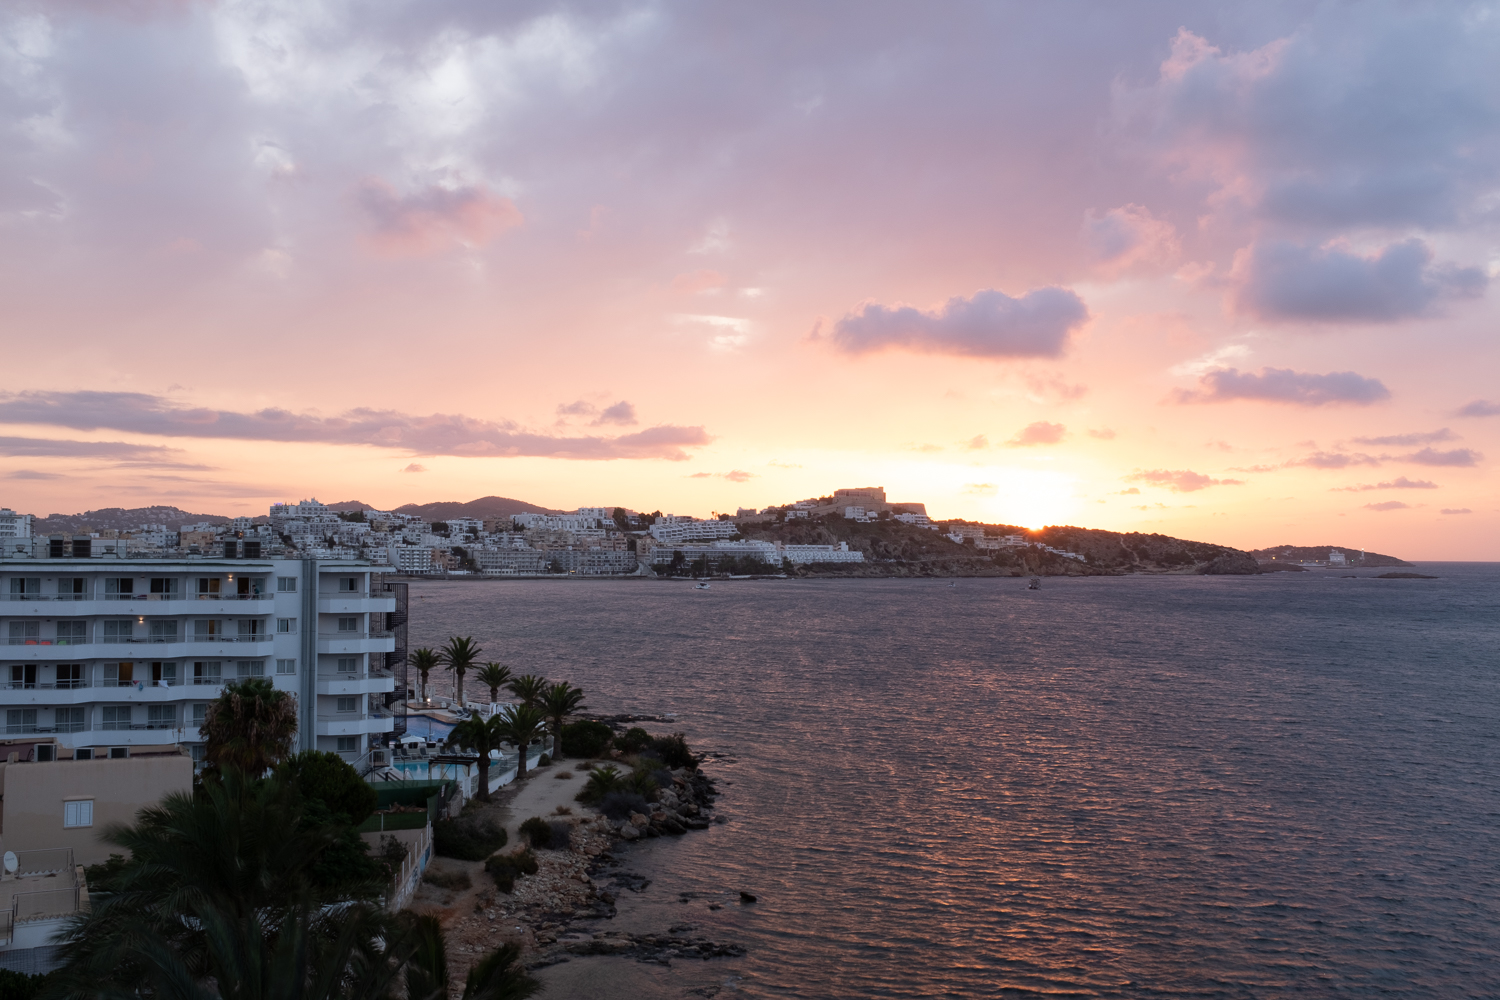
 It’s easy enough to do with your camera though, and potentially gives much better results… Start by setting your camera to ‘exposure bracketing mode’
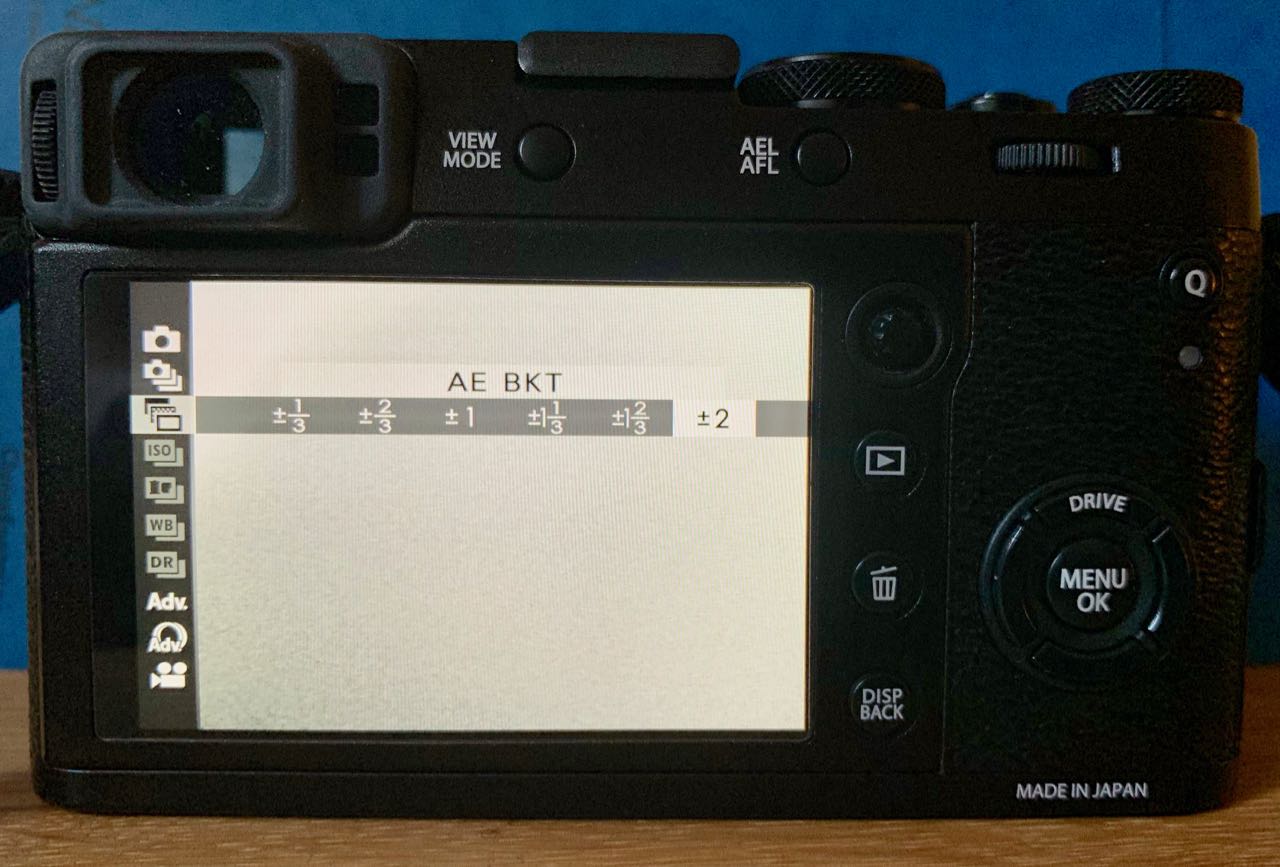
 (If you really feel you need more than 3 shots with the X100F, there is a workaround – set the camera as above and take your first three shots, then turn the compensation dial to say, -3 and shoot again, then repeat using +3 – that way you end up with a series of 9 shots covering a wider exposure range. Keep the camera still during this whole process, so it really does mean using a tripod… Then choose maybe 5 or 7 shots that cover the range of exposures from darkest to lightest. Remember that with the X100F you can change exposure compensation by up to +5 and -5 by using the front wheel.)
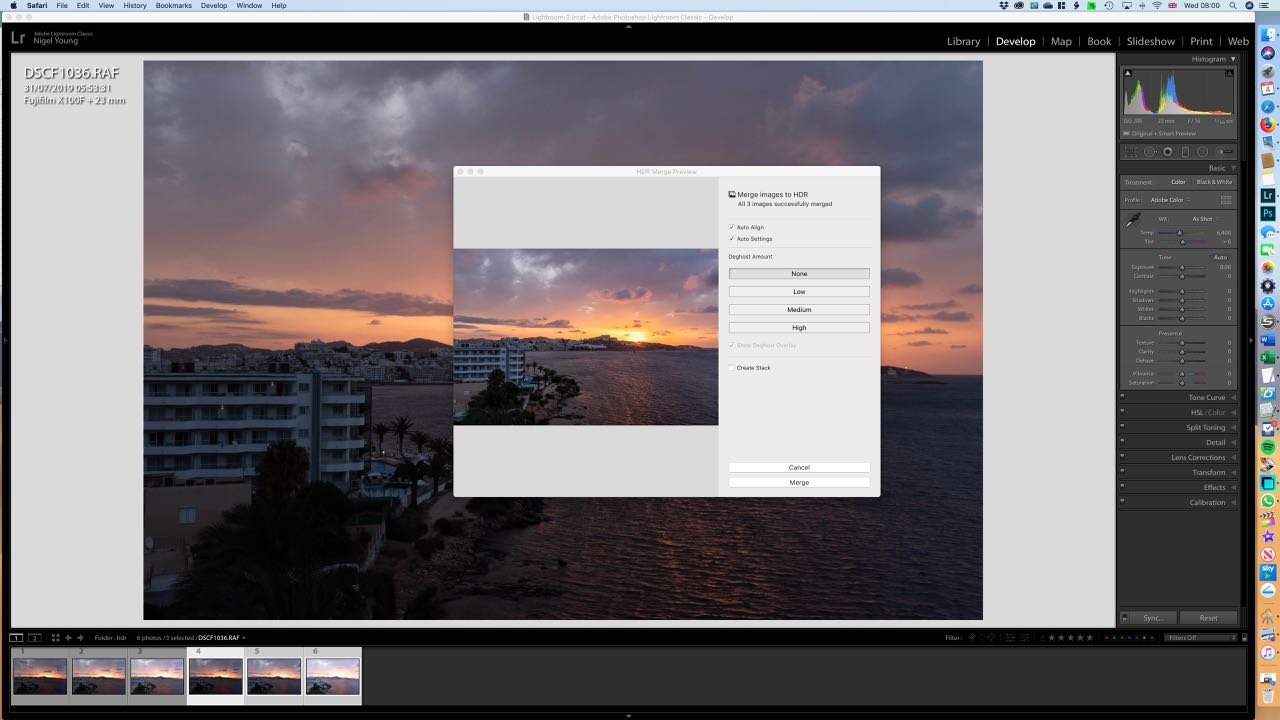 Then import your photos for editing (I always use Lightroom, but there is other software that will do HDR merging). Then select your set of images and right click, select Photo Merge, than HDR. It’ll take a few seconds to create a preview depending on how fast your computer is, and how many photos you are merging. Adjust the options for auto aligning images and adjusting deghosting if necessary and then click ‘merge’ and Lightroom will, in a few seconds, add the new merged image to your filmstrip.
 I bought my first X100 camera, an X100S (’S’ for 2nd generation) back in 2014, largely as a result of seeing Todd Gipstein’s wonderful
  To be fair, it did work for me for a while, and a produced some decent enough photos, but inevitably I slipped back into GAS (Gear Acquisition Syndrome) and I figured a second interchangeable lens body would suit me better, so sold the X100S. After about 6 months, I really missed that little camera’s portability and relative simplicity, so picked up what was then the latest 3rd generation X100T, but didn’t end up using it as much as my other cameras, so that too went after a few months!
 Fast forward to 2017, and I was invited to a launch event for the latest 4th generation X100F, and although very impressed, wasn’t tempted to spend the £1200 asking price. I did however manage to borrow one for a family holiday in France in 2018 as I was looking for something more portable than the Sony A7iii which by then was my main camera. I also had a Sony A6300 – great little camera, but there wasn’t a compact lens for it that delivered really good image quality so I had doubts about it as a travel camera.
 It took me a while to realise that all I really needed was the Fujifilm X100F – small, simple, but capable of great results. No lenses to change, just a lens hood and a couple of spare batteries, and the camera is pretty much pocketable too.